Thursday 27 June 2013

Remove Clothing, Gear and Weapons From Your Character

Often when editing loadouts for ArmA 3, just adding the new item on top of an old one may cause the old item to just sit on the floor. This can get annoying, especially when rearming an entire platoon or squad. The simple way to prevent this is to write a single line of code to remove the item before adding a new one. If the item doesn't exist, it can't create litter. The line in question is this:

removeHeadgear unit;

The first component, removeHeadgear, is the actual command that describes what is to be removed from the following component. The following component, unit, details which solider the command will affect, in this case, to remove any headgear he may be wearing.

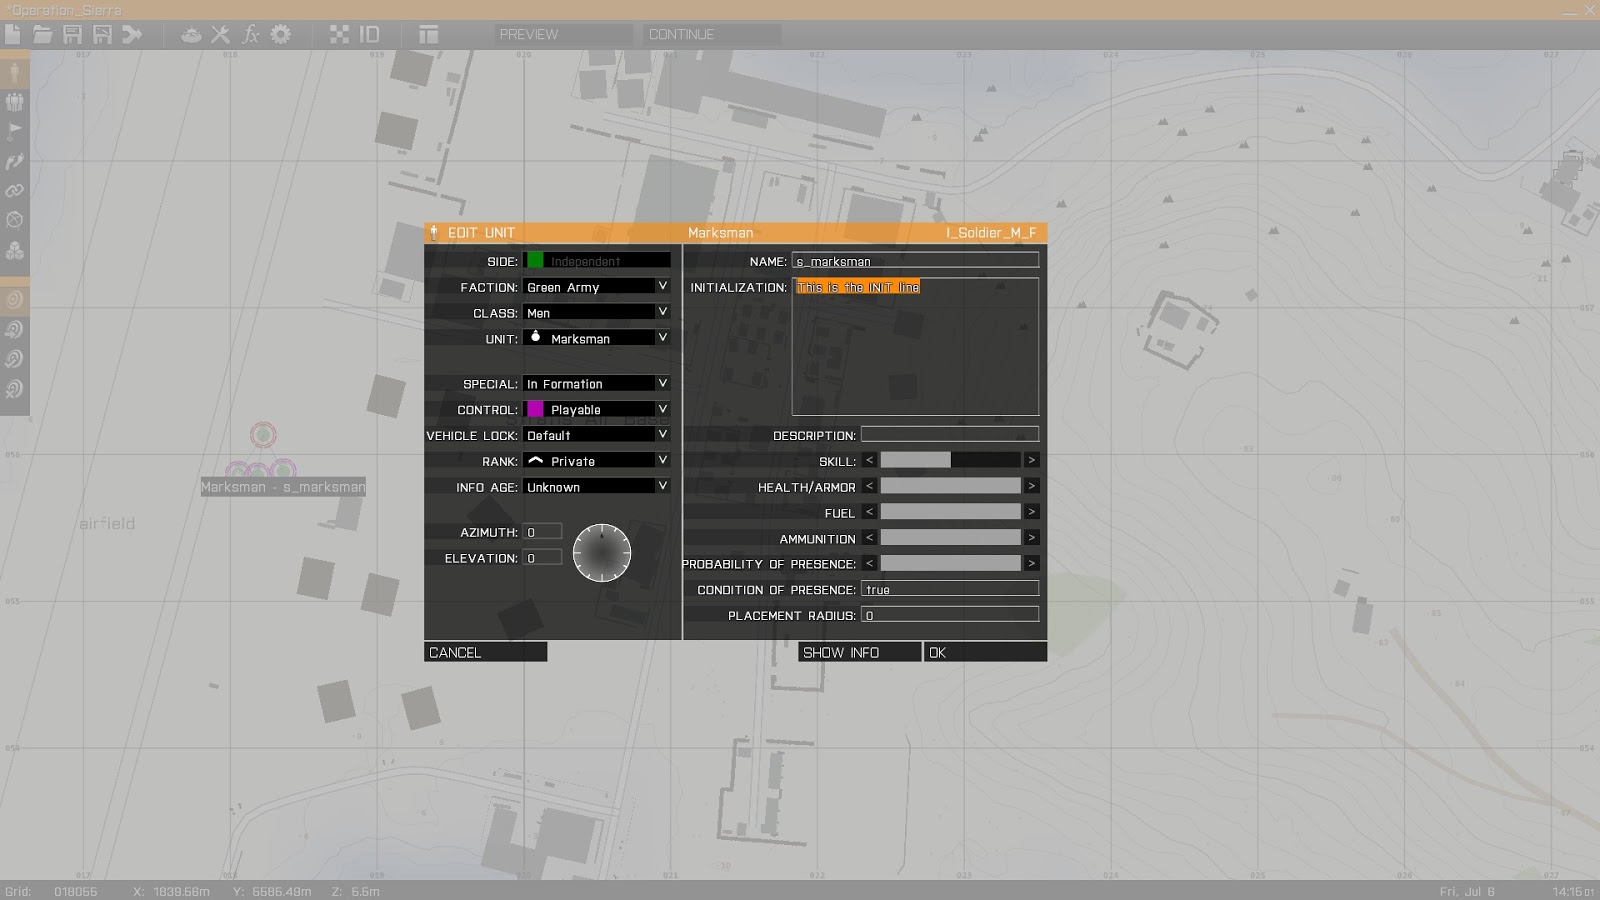
This line is placed in the INIT line (shown below):
There are a few options for the unit component that will allow for tweaking of who is affected by the command. Perhaps the easiest one to learn and use is this. It will run the command on whoever the INIT line belongs too, in this case, s_marksman.

A sample of the code that may be used would :

removeHeadgear this;
removeHeadgear s_marksman;

Both commands will remove the headgear, but the second line will always affect the s_marksman soldier regardless of whose INIT line the code is written in. This can be useful when rearming an entire squad as only one soldier will need to have all the code inside of their INIT line.

What about altering weapons or items? This is done in a very similar fashion, the difference comes between the use of all and allassigned. Here is some sample code to remove the items from a unit:
removeallitems this;
removeallassigneditems this;

This can get a little confusing. The first line will not remove any items that are currently being used or are assigned to the player. For example, a map or GPS device. The second line will remove every item on the character, including assigned items such as the map. Only removing stored items can come in handy for clearing a unit but not having to re-add all the base items like a map or compass.

Weapons can also be removed using this command:
removeAllWeapons this;

This will, as the command shows, remove all weapons and attached items from the soldier. This is useful for rearming the soldier with the weapons that you want them to have.

It is also possible to completely clear the soldier of everything, using a combination of all these commands:

removeHeadgear this:
removeGoggles this;
removeVest this;
removeBackpack this;
removeUniform this;
removeAllWeapons this:
removeAllAssignedItems this;

This will remove absolutely everything from the soldier, weapons, clothing, maps, ammo etc. Here is what the character will look like after using this code:


Now a blank slate has been created to allow for full customisation with no possibility of leftover items or conflicting items. Here is a summary of all the code:
_________________________________________________________________________________

The base command:
removeHeadgear unit;

Remove all Clothing:
removeHeadgear this:
removeGoggles this;
removeVest this;
removeBackpack this;
removeUniform this;

Remove all Weapons:
removeAllWeapons;

Remove all items and only stored ones;
removeAllAssignedItems;
removeAllItems 

Remove Everything and make blank slate:
removeHeadgear this:
removeGoggles this;
removeVest this;
removeBackpack this;
removeUniform this;
removeAllWeapons this:
removeAllAssignedItems this;

That is how to remove items of different types and create a blank slate for customisation. The next post will detail how to add Weapons and Ammo as well as adding and removing attachments.


Add Clothing and Gear to Your Character

ArmA 3 has changed it's gear system quite drastically, implementing Weapon attachments and a more open clothing/gear system. Not only does this allow for the mod community to easily create unit packs and re-textures, it also allows for people to easily and quickly customise their soldiers for their preferred look or battle scenario.

All this can be done using very simple code in the INIT line of a unit (shown below):

From here we can alter many properties for the character such as headgear, goggles, vests, uniforms and backpacks using a single line of code.

unit addHeadgear "Classname";

The unit component describes which soldier is to be edited, for example this or player. The addHeadgear component is the actual command, this will assign whatever object is written after it to the correct part, In this case the head, to the unit described. Finally, the "Classname" component is the actual item to be assigned. Classnames aren't as simple as just typing the name of the item, but a way to find them easily will be detailed in later post.

Those are the components that make up the command. But what about actual working code? Below is an example of a command that will place the Digital Camo Military Cap onto the soldier named s_marksman:

s_marksman addHeadgear "H_MilCap_dgtl";

Simply write this into the init line of any character and it will place it on the s_marksman soldier. If you want to place the Cap onto the current unit without a name or just for ease of coding, the unit component can be replaced with this.

this addHeadgear "H_MilCap_dgtl";

This command will assign the Digital Military Cap to whatever unit the line is placed in. It can be used in as many units as you like and will not conflict.

With these commands you can create a quick, customised character to suit your liking or environment. Here is an example to create a Recon Marksman styled soldier:

this addheadgear "H_Watchcap_camo";
this addUniform "U_I_CombatUniform";
this addVest "V_PlateCarrierIA1_dgtl";
this addBackpack "B_AssaultPack_ocamo";
this addGoggles "G_Shades_Black";


Here is what the soldier will look like after the code is placed:
The soldier is now fit for operations and also does a great job at looking awesome too. Below is a summary of all the code and components:
_________________________________________________________________________________
The basic outline of the command:
unit command "Classname"; 
A simple command to assign the item to the current soldier
this addHeadgear "H_MilCap_dgtl";
Completely re-dress the soldier:
this addheadgear "H_Watchcap_camo";
this addUniform "U_I_CombatUniform";
this addVest "V_PlateCarrierIA1_dgtl";
this addBackpack "B_AssaultPack_ocamo";
this addGoggles "G_Shades_Black";
The next post will be looking at how to remove items, weapons and gear from soldiers to allow for easier customising and replacing.