Tuesday 15 October 2013

Auomatic Gear Box - Part 2

EDIT: Sorry for the late post, the coding used within the scripts was slightly incorrect and this lead to a long time trying different solutions until it finally clicked. Sorry for any inconvenience, the next post should be up on time, with a bit of luck!

Last time we looked at adding in the script to manually assign gear to a unit, this was done through the use of if statements. Now we will be looking at making the whole thing look better by adding in an animation. This will be a simply tutorial on the basic animation command. A full look into the Animation Viewer will be up at a later date. So now onto the animation. We will be using a simple animation that looks as though the unit is altering his scope mount. The animation we are using is called:

"DismountOptic"

This animation is about 4 seconds long, so won't intrude on our gameplay much. Now we have the animation, it's time to look at the command to use it. The easiest way to test this is in the debug console. Simply start up the editor, get into the map, hit pause then type into the box on the top right [Shown below]

The line of code we will be using is this:

unitname playMoveNow "AnimationName";

Breaking it down, we have unitname, this corresponds to whatever unit you want to perform the animation. playMoveNow is the main command. This, quite literally, forces the animation to be played. "AnimationName" refers to the classname of the animation, for example, our "DismountOptic" name.

Lets practice this in the editor. If you named your unit then simply type the command above, subbing in your unit name and the animation name, it should look similar to this:

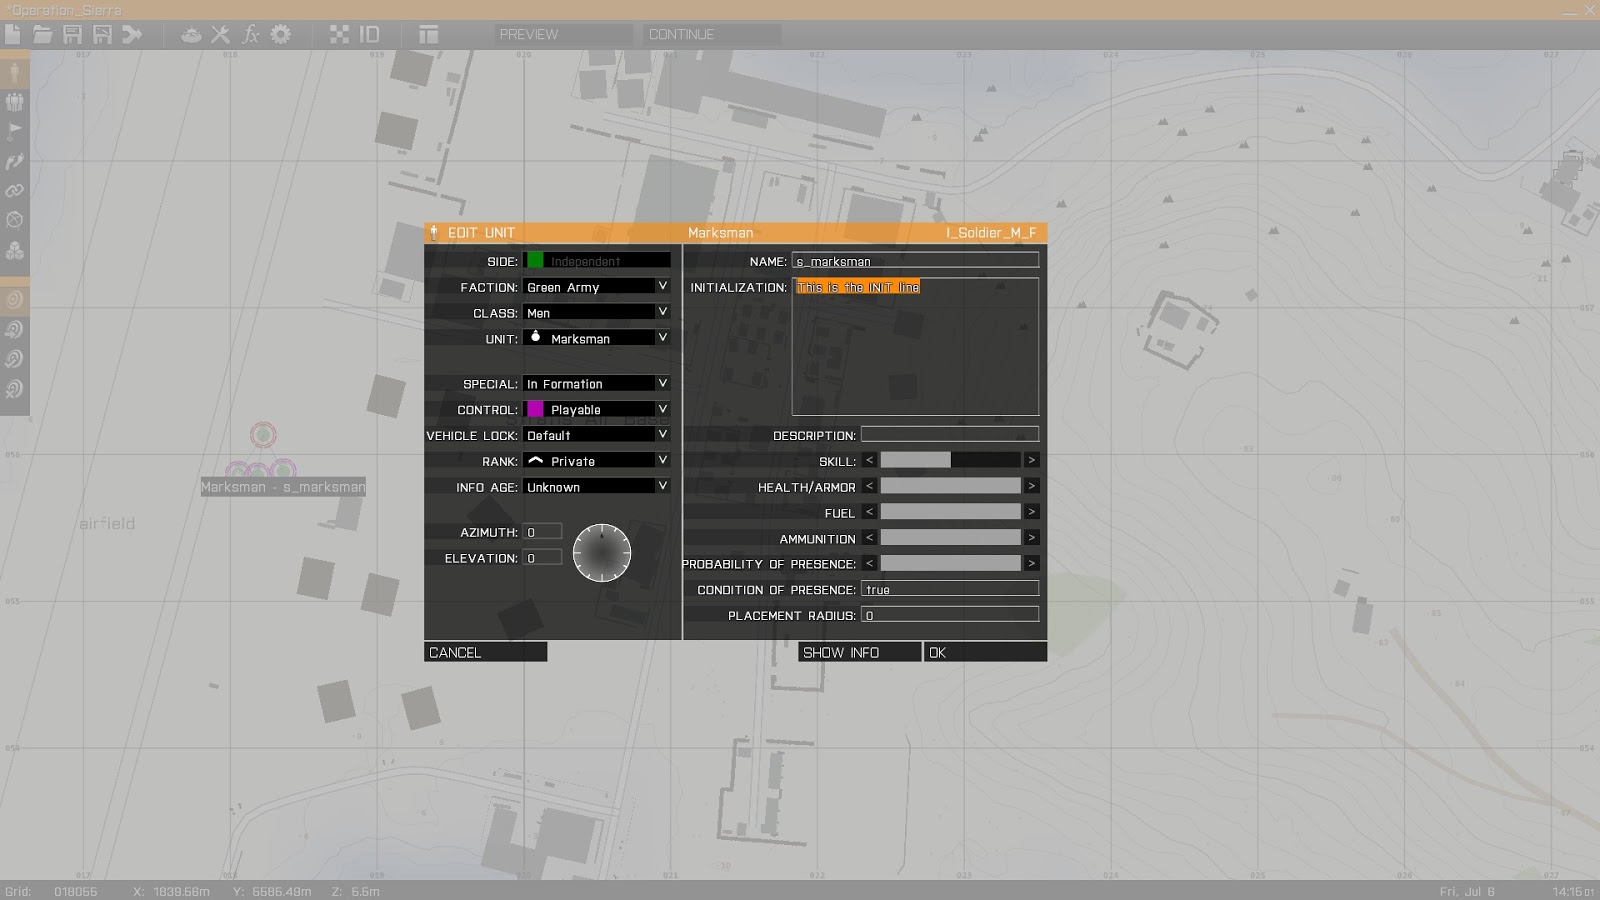
s_marksman playMoveNow "DismountOptic";

Didn't give your unit a name? Don't worry, simply replace the unit name with player. We can see how this can be used later to save us some time:

player playMoveNow "DismountOptic";

So now we can force a single unit to perform an animation. But what if we want an entire squad of players to do it? As mentioned before, we can simply sub in the unit name for player. This will result in any non-NPC performing the action. But there is one issue. What if we have NPC's or AI units? They won't perform the action as they aren't players. This is where we will need to further out coding skills a little. We will be looking at forEach loops:

forEach loops are great ways to force certain actions upon an entire range of units, without having to copy and paste the code over and over again. It will look something like this:

{ code/commands } forEach Array;

Breaking that down, we have a code/command area, this is where we will right all the coding to be performed. forEach is the main command that specifies to perform the code/command segment on the array. Array, arrays are a data storage method, it's easiest to think of them like tables in a database or spreadsheet. We can create arrays very easily in game using a single line of code. The Array relates to the group of units or objects that we wish the action to be performed on. But how do we create arrays?

ARRAYNAME = [name1, name2, name3];

It is that simply. All we have to do is sub in the values and put this code onto any unit's INIT line or even the *.sqf file itself (but more on those in part 3). An example to create a small team array could be:

TEAM = [s_marksman, s_rifleman, s_engineer, s_medic];

This will create an array containing those four units. Now we can implement this in our forEach loop:

 { code/commands } forEach TEAM;

Let's test this with the animation. Let's add four units then call them s_marksman, s_engineer, s_medic and s_rifleman. Now under any of the units INIT line. Type:

TEAM = [s_marksman, s_rifleman, s_engineer, s_medic];

That's created our array. So start up the game and inside the debug line we can type this forEach loop:

{ _x playMoveNow "DismountOptic" } forEach TEAM;

_x is a local variable, or temporary variable that represents each unit of the array. In short, that line of code will be performed on every unit within the TEAM array, regardless of whether they are a human player or not.

So they should all have performed the action, if they didn't try setting up a trigger with the same code over the units, when they move it should trigger the animation.

Now for an event handler. This will allow us to add an action to any object that when selected will call our animation and gear change code. This is that code:

objectname addAction ["ActionName","Code",[ARRAY],1,false,true,"","(_target distance _this) < 3"];

Let's break down the main components. objectname refers to the name of the object to have the action added to. addAction is the main command that adds the action parameters to the object. "Action name" refers to the text that will be displayed under the action menu of the item. Code is where we will be adding our re-arm coding. [ARRAY] refers to the array that the action will be visible to. "(_target distance this) < 3" refers to the the minimum distance that the action will appear from, in this case, a 3 metre diameter.

Now lets create the script. First off, make sure that an object is placed, the best object would be an ammo box from Unit->Empty->Ammo->"Object, make sure to name it Box1.

Add this line to the gearbox's INIT line:

Box1 addAction ["Re-Arm","Code",[TEAM],1,false,true,"","(_target distance _this) < 3"];

What we are going to do now is create the *.sqf file, we are going to look at this now instead of in part 3 because it just becomes too messy otherwise. Best to get into good practices now rather than make errors later.

First things first, we will need to save the mission. This is so we have somewhere to actually place the files. At the top of the editor we can see the buttons for saving, If we highlight them then a small tool-tip appears explaining what it does. We want the Save As option. This will open a new dialog, select user missions and give it a name. Now our mission is saved we can add the script into it's directory. Alt+Tab or close ArmA III and go open file explorer. Head to this location:

C:\Users\XXX\Documents\Arma 3\XXX\missions\YOURMISSION
 
C:\Users\XXX\Documents\Arma 3 - Other Profiles\XXX\YOURMISSION

If you create a second profile, then you will need to navigate to the Other profiles directory to find your mission. Once here, there should be a mission.sqm file. All we need to do is copy or save our *.sqf file (Created in notepad or another text editor) into one of our mission folders here:

Can't remember the actual file? All the coding will be at the bottom of this post. So now for the final part, to call the script. Go back to ArmA III or re-open it. From here go to the Box1 INIT line and change the code section to something similar to this:

Box1 addAction ["Re-Arm","DynamicReam.sqf",[TEAM],1,false,true,"","(_target distance _this)<3"];

Simply change to "DynamicReam.sqf" to whatever the name of the *.sqf file is. Now that we have that done. Run the level and check that the action is visible when you approach the box like this:
Hopefully when the action is selected the unit's gear changed and the animation was performed. If it didn't check here for all the coding used in this post.
_______________________________________________________________________
playMoveNow command
unitname playMoveNow "AnimationName";

 forEach loop

{ code/commands } forEach Array;


Creating simple arrays
ARRAYNAME = [name1, name2, name3];

Basic array example
TEAM = [s_marksman, s_rifleman, s_engineer, s_medic];

 forEach loop example
{ _x playMoveNow "DismountOptic" } forEach TEAM;

 addAction command
objectname addAction ["ActionName","Code",[ARRAY],1,false,true,"","(_target distance _this) < 3"];  

 addAction example
Box1 addAction ["Re-Arm","DynamicReam.sqf",[TEAM],1,false,true,"","(_target distance _this)<3"]; 

Example paths for saved missions
C:\Users\XXX\Documents\Arma 3\XXX\missions\YOURMISSION
C:\Users\XXX\Documents\Arma 3 - Other Profiles\XXX\YOURMISSION
 
 Full *.sqf file for an automatic gearbox

 Event Handler
Box1 addAction ["Re-Arm","DynamicReam.sqf",[TEAM],1,false,true,"","(_target distance _this)<3"];

Main file
{ _x playmoveNow "DismountOptic"} forEach TEAM
sleep 3;
if (IsPlayer s_marksman) then
{
    removeHeadgear s_marksman;
    removeVest s_marksman;
    removeGoggles s_marksman;
    removeBackpack s_marksman;
    removeAllWeapons s_marskman;
    removeUniform s_marksman;
   
    s_marksman addheadgear "H_Watchcap_camo";
    s_marksman addUniform "U_I_CombatUniform";
    s_marksman addVest "V_PlateCarrierIA1_dgtl";
    s_marksman addBackpack "B_AssaultPack_ocamo";
    s_marksman addGoggles "G_Shades_Black";

    s_marksman addMagazine "20Rnd_762x51_Mag";
    s_marksman addMagazine "20Rnd_762x51_Mag";
    s_marksman addMagazine "20Rnd_762x51_Mag";
    s_marksman addMagazine "20Rnd_762x51_Mag";
    s_marksman addMagazine "20Rnd_762x51_Mag";
    s_marksman addWeapon "srifle_EBR_MRCO_pointer_F";
    s_marksman addPrimaryWeaponItem "muzzle_snds_B";
    s_marksman addMagazine "16Rnd_9x21_Mag";
    s_marksman addMagazine "16Rnd_9x21_Mag";
    s_marksman addWeapon "hgun_P07_snds_F";
};

if (IsPlayer s_rifleman) then
{
    removeHeadgear s_rifleman;
    removeVest s_rifleman;
    removeGoggles s_rifleman;
    removeBackpack s_rifleman;
    removeAllWeapons s_rifleman;
    removeUniform s_rifleman;

    s_rifleman addheadgear "H_Booniehat_dgtl";
    s_rifleman addUniform "U_I_CombatUniform";
    s_rifleman addVest "V_PlateCarrierIA1_dgtl";
    s_rifleman addBackpack "B_Carryall_oli";
    s_rifleman addGoggles "G_Tactical_Clear";

    s_rifleman addMagazine "30Rnd_556x45_Stanag";
    s_rifleman addMagazine "30Rnd_556x45_Stanag";
    s_rifleman addMagazine "30Rnd_556x45_Stanag";
    s_rifleman addMagazine "30Rnd_556x45_Stanag";
    s_rifleman addMagazine "30Rnd_556x45_Stanag";
    s_rifleman addWeapon "arifle_Mk20_MRCO_F";
    s_rifleman addPrimaryWeaponItem "muzzle_snds_M";
    s_rifleman addMagazine "16Rnd_9x21_Mag";
    s_rifleman addMagazine "16Rnd_9x21_Mag";
    s_rifleman addWeapon "hgun_P07_snds_F";
};

if (IsPlayer s_spot) then
{   
    removeHeadgear s_spot;
    removeVest s_spot;
    removeGoggles s_spot;
    removeBackpack s_spot;
    removeAllWeapons s_spot;
    removeUniform s_spot;

    s_spot addheadgear "H_Cap_grn_BI";
    s_spot addUniform "U_I_GhillieSuit";
    s_spot addVest "V_BandollierB_oli";
    s_spot addBackpack "B_AssaultPack_khk";

    s_spot addMagazine "5Rnd_127x108_Mag";
    s_spot addMagazine "5Rnd_127x108_Mag";
    s_spot addMagazine "5Rnd_127x108_Mag";
    s_spot addMagazine "5Rnd_127x108_Mag";
    s_spot addMagazine "5Rnd_127x108_Mag";
    s_spot addWeapon "srifle_GM6_SOS_F";
    s_spot addPrimaryWeaponItem "acc_Pointer_IR";
    s_spot addMagazine "16Rnd_9x21_Mag";
    s_spot addMagazine "16Rnd_9x21_Mag";
    s_spot addWeapon "hgun_P07_snds_F";
   
};

if (IsPlayer s_medic) then
{

    s_medic addHeadgear "H_Cap_blk_Raven";
    s_medic addUniform "U_I_CombatUniform_tshirt";
    s_medic addVest "V_PlateCarrierIA1_dgtl";
    s_medic addBackpack "B_AssaultPack_rgr_ReconMedic";
    s_medic addGoggles "G_Tactical_Black";


    s_medic addMagazine "30Rnd_556x45_Stanag";
    s_medic addMagazine "30Rnd_556x45_Stanag";
    s_medic addMagazine "30Rnd_556x45_Stanag";
    s_medic addMagazine "30Rnd_556x45_Stanag";
    s_medic addMagazine "30Rnd_556x45_Stanag";
    s_medic addWeapon "arifle_Mk20C_F";
    s_medic addPrimaryWeaponItem "optic_MRCO";
    s_medic addPrimaryWeaponItem "muzzle_snds_M";
    s_medic addMagazine "16Rnd_9x21_Mag";
    s_medic addMagazine "16Rnd_9x21_Mag";   
    s_medic addMagazine "16Rnd_9x21_Mag";
    s_medic addWeapon "hgun_P07_snds_F";"

}

if (IsPlayer s_auto) then
{
    s_auto addheadgear "H_HelmetIA_camo";
    s_auto addUniform "U_I_CombatUniform_shortsleeve";
    s_auto addVest "V_PlateCarrierIA2_dgtl";
    s_auto addBackpack "B_AssaultPack_khk";
    s_auto addGoggles "G_Combat";
   
    s_auto addMagazine "200Rnd_65x39_cased_Box";
    s_auto addMagazine "200Rnd_65x39_cased_Box";
    s_auto addMagazine "200Rnd_65x39_cased_Box";
    s_auto addWeapon "LMG_Mk200_F";
    s_auto addMagazine "16Rnd_9x21_Mag";
    s_auto addMagazine "16Rnd_9x21_Mag";
    s_auto addWeapon "hgun_P07_snds_F";
   
};

if (IsPlayer s_engineer) then
{
    s_engineer addHeadgear "H_MilCap_dgtl";
    s_engineer addUniform "U_I_CombatUniform";
    s_engineer addVest "V_PlateCarrier_IA2_dgtl"
    s_engineer addBackpack "B_AssualtPack_rgr_Repair";
    s_engineer addGoggles "G_Combat";

    s_engineer addMagazine "30Rnd_556x45_Stanag";
    s_engineer addMagazine "30Rnd_556x45_Stanag";
    s_engineer addMagazine "30Rnd_556x45_Stanag";
    s_engineer addMagazine "30Rnd_556x45_Stanag";
    s_engineer addMagazine "30Rnd_556x45_Stanag";
    s_engineer addWeapon "arifle_Mk20C_F";
    s_engineer addPrimaryWeaponItem "optic_ACO_grn";
    s_engineer addMagazine "16Rnd_9x21_Mag";
    s_engineer addMagazine "16Rnd_9x21_Mag";
    s_engineer addMagazine "16Rnd_9x21_Mag";
    s_engineer addWeapon "hgun_P07_snds_F";

};

_______________________________________________________________________
And that is how to create an automatic gearbox that will, well, automatically arm troops using an event handler. This can be used in a variety of ways and the coding can be tweaked and utilised practically anywhere to any result. Want to make a repair station for vehicles, why not use the automatic gearbox code (tweaked of course)? The basics taught here are very valuable to any missions that feature dynamic systems. What about those animations? Well, the next tutorial will be looking at the Animation viewer and different uses for custom placed animations in depth.

Sunday 6 October 2013

Automatic Gear Box - Part 1

EDIT: The original if statement coding (name player == "unitname") has been changed to (IsPlayer unitname) this is because of a slight update to the sqf format in ArmA III that results in name player now returning the actually players profile name as opposed to the unit name, sorry for any inconvenience this may have caused

Sometimes during a scenario, you will want certain soldiers to be equipped with specific gear, i.e, you don't want every player choosing that lovely .50 Cal sniper. An SQF script can be created in order to gear up, say, a sniper with long range gear, and a grenadier with an under barreled grenade-launcher.

Before anything else, this tutorial is quite long to write with the detail needed to understand every aspect, for this reason the tutorial will be split into parts. This part will explain the main script, the second part will go into the event handler and animations and the third and final part will go into putting it all together and adding it to your mission.

First things first, we are going to need a basic squad to work with, by placing a small rifle squad (from groups, the faction of your choice, then rifle squad). It is very important that you give them each soldier a unique name, you can do this by typing in the editbox above the INIT line here:
 For the purpose of this script. let's name the soldiers based on their role:

s_marksman
s_rifleman
s_spot
s_medic
s_auto
s_engineer

These names can be changed to anything, just remember to change the names that the script references. it is worth noting, that you don't have to place a sniper unit to call it s_sniper or a rifleman for s_rifleman. The script will provide the user with the correct gear regardless of starting role.

So now we can begin to write our script to apply the gear we want onto characters. This will recall some of the commands explained in previous tutorials such as addWeapon and removeVest.

We will start by opening Notepad or any other text editor. We can treat Notepad like the INIT line of a unit a just type code directly into it. However, unlike the INIT line, it will not give you the options available for a command or give you immediate error reports, it is important that you take your time and check your code for errors. Now that we have that out of the way, let's get onto the actual code. We will be using a simple if statement. They look like this:

if (staement to be checked)
     if statement is true
     {
           Do this
     } 
     else
     {
          Do this
     }

We can use this statement to check if the unit is being played and perform the action on the player that has undertaken that role. The if statement we will be using is this:

if (IsPlayer s_marksman)
     {
           Do this
     }

We do not need an else loop as there is nothing to be performed if the unit is not being played. So now let's break down this loop.

IsPlayer is a command that will check if the unit, in this case s_marksman, is actually a player unit. If the value is returned as true, then our if statement will be executed, otherwise it will be ignored.

In short, this command will check if the player name is equal to s_marksman and if it is, perform the code segment within the curly braces {}.

"{}" - These are know as curly braces, they denote the start and end of code segments, in this case, our if statement-true coding.

Now for the Do This section. We need to think of the basic things a unit has, and needs. As we are removing all the gear first, we will need to re-add maps, compasses, NVG's etc.

So we will need to remove all pieces of gear currently equipped, this can be done using the remove command showed in earlier tutorials:

removeHeadgear s_marksman;
removeVest s_marksman;
removeGoggles s_marksman;
removeBackpack s_marksman;
removeAllWeapons s_marskman;
removeUniform s_marksman;

This has cleared all the gear from the s_marksman soldier and now he is ready to be kitted out, this should be placed in between the curly braces of the if statement. Now we can begin to kit out our marksman with all the gear he needs.

s_marksman addHeadgear "Classname";
s_marksman addUniform "Classname";
s_marksman addVest "Classname";
s_marksman addBackpack "Classname";
s_marksman addGoggles "Classname";

This will add the headgear, uniform, vest, backpack and goggles to our marksman. "Classname" will be replaced by the classnames used for the item we want, for example, "G_Shades_Black" for a set of lovely black sunglasses. Now for his weapons:

 s_marksman addMagazine "Classname";
 s_marksman addWeapon "Classname";
 s_marksman addPrimaryWeaponItem "Classname";


Here we are adding the magazine, weapons and an attahcment (such as a silencer or scope). However, it is very important to note that the magazine must be added before the weapon, if not, then the gun will be empty when the player receives it! Again, the "Classname" will be replaced by an item classname such as "muzzle_snds_B".

Time to add those crucial items needed for battle. This can be used by a single line of code:

s_marksman addItem "Classname"

The item to be added depends on the "Classname" field, for example, "nvgoggles" for night vision goggles. NVG's on demand!

Now that we have all the code for s_marksman, we can simply copy it for all the other units, changing the name player == "unit name" segment and the objects!

There is another line of code that we will be using, this code will remove the gearbox used for re-arming, off the map after we are done with it.

deleteVehicle name;

This line of code does exactly what is says on the tin, it will delete a vehicle (vehicles being objects in most scenarios) of the name entered. We can replace name with the name of our gearbox in order to remove it from the world after play.

So that is the main script completed, with the exception of the animation. So here is all the coding done so far:
_________________________________________________________________
If statement
if (statement to check)
is true then
{
      Do This;
 
else
{
      Do This;
}

Player Check Statement
 Isplayer unitname

If true re-arm coding:

-Gear Removal-
removeHeadger "Classname";
removeVest "Classname";
removeGoggles "Classname";
removeBackpack "Classname";
removeAllWeapons "Classname";
removeUniform "Classname";

-Gear Addition-
unit name addHeadgear "Classname";
unit name addUniform "Classname";
unit name addVest "Classname";
unit name addBackpack "Classname";  
unit name addGoggles "Classname";

-Weapon and Item Addition-
unit name addMagazine "Classname";
unit name addWeapon "Classname";
unit name addPrimaryWeaponItem "Classname";
(unit name addSecondaryWeaponItem "Classname") 
- This can be used to add attachments to sidearms
unit name addItem "Classname";

-GearBox Removal-
deleteVehicle name;

Here is a full segment from a script I used so you can see what it will look like when fully implemented

  
if (IsPlayer s_marksman) then
{
    removeHeadgear s_marksman;
    removeVest s_marksman;
    removeGoggles s_marksman;
    removeBackpack s_marksman;
    removeAllWeapons s_marksman;
    removeUniform s_marksman;
  
    s_marksman addheadgear "H_Watchcap_camo";
    s_marksman addUniform "U_I_CombatUniform";
    s_marksman addVest "V_PlateCarrierIA1_dgtl";
    s_marksman addBackpack "B_AssaultPack_ocamo";
    s_marksman addGoggles "G_Shades_Black";

    s_marksman addMagazine "20Rnd_762x51_Mag";
    s_marksman addMagazine "20Rnd_762x51_Mag";
    s_marksman addMagazine "20Rnd_762x51_Mag";
    s_marksman addMagazine "20Rnd_762x51_Mag";
    s_marksman addMagazine "20Rnd_762x51_Mag";
    s_marksman addWeapon "srifle_EBR_MRCO_pointer_F";
    s_marksman addPrimaryWeaponItem "muzzle_snds_B";
    s_marksman addMagazine "16Rnd_9x21_Mag";
    s_marksman addMagazine "16Rnd_9x21_Mag";
    s_marksman addWeapon "hgun_P07_snds_F";
};


deleteVehicle Box1;

The player unit would look like this after the code has been executed:

__________________________________________________________________
That is how to create a simple if statement that will allow us to automatically re-arm a unit and then remove the box. In part 2 we will be looking at adding the animation and event handler using a rudimentary coding method within the INIT line. Part 3 will detail a much cleaner method of calling our code.


Friday 27 September 2013

Creating Custom Gearboxes

Sorry for the long delay in any posts, didn't expect anyone to actually read them! Thanks for any readers so far, I will try to get at least one post a week from this point on (including any larger projects I may have in the works).

So onto gearboxes. Sometimes you will want to kit your character out at a particular point in a mission, While you could set trigger areas to do this, it doesn't feel as real or smooth as using gearboxes. However, first we will need to find ourselves a way of stashing our glorious ArmA loot.

Open up the editor and place down a single unit. This should create a player unit(to check, look if the unit has a red ring around it). Once this is placed, a new option will appear for placing single units called "Empty". In here there are a mass of different objects that can be placed, from tents to car wrecks. We will be focusing on the "Ammo" class. [Shown below]


Once we decide on an ammo box, it can be placed near our character as a normal object would. Now to get to the script, open the item's INIT line:
 Depending on what box is chosen, it will contain some related items by default, we don't want this. By entering the clearMagazineCargo, clearWeaponCargo and clearItemCargo, we can remove all items from withing the box, thus providing a blank slate.
clearMagazineCargo this;

clearItemCargo this;

clearWeaponCargo this;

Now for the fun stuff. We can begin to add and customise our Gearbox as desired. The entire code for a personal Bluefor loadout can be found at the bottom of this post. We will be using four main commands to fill our Gearbox with goodies. These are:

this addItemCargo ["Classname",Quantity];

this addMagazineCargo [Classname,Quantity];

this addBackpackCargo [Classname,Quantity];

this addWeaponCargo [Classname,Quantity] ;

Let's break this down; "this" refers to the current object of the INIT line (the gearbox), when referencing the gearbox for other purposes, a name must be assigned and this replaced with the object name. for example, gearboxBlue1.
     addItemCargo, or it's variations, refer to the actual type of item we are adding. Magazines. backpacks and weapons are exactly what they say. However, addItemCargo covers more than just medkits and NVG;s. Uniforms, attachments, vests, headgear, explosives and items, are all covered by this command.
     Classname refers to the actually config name of the item, such as, "H_Milcap_blk" for a black military cap. [How to find these classnames will be shown in a later blog using 2 different methods]
     Quantity refers to, well, how many of the item you want to be stored, if you have a 3-man squad, make sure you have plenty of ammo and supplies!

Now we can start to place real items, an example for each command are below:

this addWeaponCargo ["arifle_MX_F",3];

this addItemCargo ["optic_Aco",3];

this addMagazineCargo ["16Rnd_9x21_Mag",15];

this addBackpackCargo ["B_Bergen_Base",1];

Here we can see that 3 base MX rifles have been added, along with three red ACO scopes, 15 9mm handgun mags and a single Bergen backpack. Remeber to use square brackets "[ ]" to denote the items and quantity within the command as shown.

So here is what the gearbox will look like when opened:

So here is all the coding for this post.
___________________________________________________________________________________

Emptying the box:

Remove magazines
clearMagazineCargo this;
Remove items and equipment
clearItemCargo this; 

 Remove weapons
clearWeaponCargo this;

Adding gear templates

Adding items and equipment
this addItemCargo ["Classname",Quantity];

Adding magazines
this addMagazineCargo [Classname,Quantity];

Adding backpacks
this addBackpackCargo [Classname,Quantity];

Adding weapons
this addWeaponCargo [Classname,Quantity] ;

Some gear examples

Adding 3 base MX rifles
this addWeaponCargo ["arifle_MX_F",3];

Adding 3 red ACO scopes
this addItemCargo ["optic_Aco",3];

Adding 15 9mm handgun mags
this addMagazineCargo ["16Rnd_9x21_Mag",15];

Adding a single Bergen backpack
this addBackpackCargo ["B_Bergen_Base",1];


A full, custom gearbox script!

//Clearing the box
clearMagazineCargo this;
clearItemCargo this;
clearWeaponCargo this;

//Adding all the required items
this addItemCargo ["FirstAidKit",3];
this addItemCargo ["nvgoggles",3];
this addItemCargo ["MediKit",3];
this addItemCargo ["ItemGPS",3];
this addItemCargo ["ItemCompass",3];
this addItemCargo ["ItemMap",3];
this addItemCargo ["ItemRadio",3];
this addItemCargo ["ItemWatch",3];

//Adding the weapons
this addWeaponCargo ["arifle_MX_F",3];
this addWeaponCargo ["hgun_P07_F",3];

//Adding the ammunition
this addMagazineCargo ["16Rnd_9x21_Mag",15];
this addMagazineCargo ["30Rnd_65x39_caseless_mag",21];

//Adding all the attachment options
this addItemCargo ["optic_Aco",3];
this addItemCargo ["optic_Hamr",3];
this addItemCargo ["optic_Holosight",3];
this addItemCargo ["acc_flashlight",3];
this addItemCargo ["acc_pointer_IR",3];
this addItemCargo ["muzzle_snds_H",3];
this addItemCargo ["muzzle_snds_L",3];

//Adding the three different uniforms
this addItemCargo ["U_B_CombatUniform_mcam_vest",1];
this addItemCargo ["U_B_CombatUniform_mcam_tshirt",1];
this addItemCargo ["U_B_CombatUniform_mcam",1];

//Adding the headgear options and glasses
this addItemCargo ["H_HelmetB",1];
this addItemCargo ["H_Cap_brn_SERO",1];
this addItemCargo ["H_Cap_Headphones",1];
this addItemCargo ["G_Tactical_Clear",3];

//Adding the vests
this addItemCargo ["V_PlateCarrier1_rgr",1];
this addItemCargo ["V_PlateCarrier2_rgr",1];
this addItemCargo ["V_BandollierB_rgr",1];

//Adding the backpacks
this addBackpackCargo ["B_Bergen_Base",1];
this addBackpackCargo ["B_Carryall_Base",1];
this addBackpackCargo ["B_Kitbag_sgg",1]; 

_________________________________________________________________________________

That's all the tools needed to start creating custom gearboxes for tactical re-arming or secret weapon stashes. Next time, we will be looking at how SQF can be used to allow for all players to be instantly "geared-up" with an animation.

Tuesday 9 July 2013

Adding Weapons, Attachments and Ammo

Perhaps the biggest thing you are going to want to change is your weapon. The current selection of guns in the Arma 3 beta is fairly slim, however the addition of a multiple attachment system allows for those weapons to be used in multiple, different scenarios. So what kind of weapons and attachments are available?

As of the Beta, there are now sniper rifles and sub-machine guns in addition to the original arsenal of LMG's, DMR's, assault rifles and sidearms. No shotguns up to yet sadly. The silver lining is that every weapon has four attachment slots:

Sight/Optics (Top)
Laser Sight/IR Pointer (Side)
Silencer (Muzzle)
Magazine (Mag well)

These slots allow you to customise your weapon to suit your play style or scenario. The assault rifles also have a variant that uses a grenade launcher, again with many varying ammo types. So how can these weapons be used? It is in fact extremely similar to customising the players outfit and gear.

All lines of code will be entered here, in the unit's INIT line:


The format of the line used is like so:

unit addWeapon "Classname";

In this case we will be using this to replace the unit portion, that will result in the currently selected soldier to be affected. addWeapon is the portion of the code that is the actual command and tells the engine to apply the following item to the desired unit. "Classname" is the actual item to be added, as with all previous items, the names aren't as simple as "MXM" or "M4";

Here is an actual line of code that will add the MXM rifle to the current unit:

this addWeapon "arifle_MXM_F";

Now that the rifle is assigned, it will need to be configured for the battlefield. For this instance the soldier will be a silent marksman tasked with ranged target acquisition and supporting fire. So here is a breakdown of what he will need for his task;

Long Range Optic
Silencer
IR Pointer

Now to add them. The command to add attachments to the soldier's primary or secondary weapon are as follows:

unit addPrimaryWeaponItem "Classname";
unit addSecondaryWeaponItem "Classname";

Depending on the command the attachment will be added to either the primary weapon or the secondary respectively. Now to add the items, here is what the gun looks like before the attachments are added:


But that is pretty plain and boring, so here is what it looks like after the attachments have been added through the code below:

this addPrimaryWeaponItem "optic_SOS";
this addPrimaryWeaponItem "acc_pointer_IR";
this addPrimaryWeaponItem "muzzle_snds_B";


Much better, now the soldier is ready for some stealthy long range action. Whilst the options for side rails are limited, it is good to know that there are many different types of scopes in Arma 3 beta, some even have different holo light variants allowing the little bit extra customisation. 

It is worth noting, however, that silencers or suppressors are very picky. Each caliber of weapon has it's own suppressor type. For instance, this rifle, the MXM, uses 7.62mm rounds and therefore requires the "muzzle_snds_B" type. Below is a full list of the suppressors and their related caliber types:

muzzle_snds_B used on 7.62mm weapons

muzzle_snds_H used on 6.5mm NATO weapons

muzzle_snds_H_MG used on 6.5mm NATO LMG's

muzzle_snds_L used on 9mm weapons

So now the weapon is fully kitted out for the soldier's mission. Except for one thing. Ammo. The ammo classnames are extremely annoying and complicated. There are also many, many different types of ammunition types for all the different calibers as well special ammo types such as flare rounds for the grenade launcher. The type of ammo that is needed for this rifle is 7.62mm rounds. Here is the code for adding ammuntion.

unit addMagazine "Classname";

So here is the specific code needed to add ammo for the MXM rifle that is currently being used:

this addMagazine "20Rnd_762x45_Mag";

This will add a single 20 round magazine for the MXM rifle (or any other weapon that uses 7.62mm rounds). In order to add more magazines, simply copy and paste the line of code for as many magazines is required.


Here is an overview of all the code used
_______________________________________________________________________________
The add weapon format:
unit addWeapon "Classname";

Code to add the MXM rifle:
this addWeapon "arifle_MXM_F";

Primary and Secondary weapon attachment format:
unit addPrimaryWeaponItem "Classname";
unit addSecondaryWeaponItem "Classname";

Code to add different attachments:
this addPrimaryWeaponItem "optic_SOS";
this addPrimaryWeaponItem "acc_pointer_IR";
this addPrimaryWeaponItem "muzzle_snds_B";

The add magazine format:
unit addMagazine "Classname";

Code to add a single 20 Round 762mm magazine:
this addMagazine "20Rnd_762x45_Mag";


So now the soldier's are kitted out with all the weapons and attachments they need along with enough ammunition to fight a small war. Next topic is how to create customised gear boxes for use in missions.


Thursday 27 June 2013

Remove Clothing, Gear and Weapons From Your Character

Often when editing loadouts for ArmA 3, just adding the new item on top of an old one may cause the old item to just sit on the floor. This can get annoying, especially when rearming an entire platoon or squad. The simple way to prevent this is to write a single line of code to remove the item before adding a new one. If the item doesn't exist, it can't create litter. The line in question is this:

removeHeadgear unit;

The first component, removeHeadgear, is the actual command that describes what is to be removed from the following component. The following component, unit, details which solider the command will affect, in this case, to remove any headgear he may be wearing.

This line is placed in the INIT line (shown below):
There are a few options for the unit component that will allow for tweaking of who is affected by the command. Perhaps the easiest one to learn and use is this. It will run the command on whoever the INIT line belongs too, in this case, s_marksman.

A sample of the code that may be used would :

removeHeadgear this;
removeHeadgear s_marksman;

Both commands will remove the headgear, but the second line will always affect the s_marksman soldier regardless of whose INIT line the code is written in. This can be useful when rearming an entire squad as only one soldier will need to have all the code inside of their INIT line.

What about altering weapons or items? This is done in a very similar fashion, the difference comes between the use of all and allassigned. Here is some sample code to remove the items from a unit:
removeallitems this;
removeallassigneditems this;

This can get a little confusing. The first line will not remove any items that are currently being used or are assigned to the player. For example, a map or GPS device. The second line will remove every item on the character, including assigned items such as the map. Only removing stored items can come in handy for clearing a unit but not having to re-add all the base items like a map or compass.

Weapons can also be removed using this command:
removeAllWeapons this;

This will, as the command shows, remove all weapons and attached items from the soldier. This is useful for rearming the soldier with the weapons that you want them to have.

It is also possible to completely clear the soldier of everything, using a combination of all these commands:

removeHeadgear this:
removeGoggles this;
removeVest this;
removeBackpack this;
removeUniform this;
removeAllWeapons this:
removeAllAssignedItems this;

This will remove absolutely everything from the soldier, weapons, clothing, maps, ammo etc. Here is what the character will look like after using this code:


Now a blank slate has been created to allow for full customisation with no possibility of leftover items or conflicting items. Here is a summary of all the code:
_________________________________________________________________________________

The base command:
removeHeadgear unit;

Remove all Clothing:
removeHeadgear this:
removeGoggles this;
removeVest this;
removeBackpack this;
removeUniform this;

Remove all Weapons:
removeAllWeapons;

Remove all items and only stored ones;
removeAllAssignedItems;
removeAllItems 

Remove Everything and make blank slate:
removeHeadgear this:
removeGoggles this;
removeVest this;
removeBackpack this;
removeUniform this;
removeAllWeapons this:
removeAllAssignedItems this;

That is how to remove items of different types and create a blank slate for customisation. The next post will detail how to add Weapons and Ammo as well as adding and removing attachments.


Add Clothing and Gear to Your Character

ArmA 3 has changed it's gear system quite drastically, implementing Weapon attachments and a more open clothing/gear system. Not only does this allow for the mod community to easily create unit packs and re-textures, it also allows for people to easily and quickly customise their soldiers for their preferred look or battle scenario.

All this can be done using very simple code in the INIT line of a unit (shown below):

From here we can alter many properties for the character such as headgear, goggles, vests, uniforms and backpacks using a single line of code.

unit addHeadgear "Classname";

The unit component describes which soldier is to be edited, for example this or player. The addHeadgear component is the actual command, this will assign whatever object is written after it to the correct part, In this case the head, to the unit described. Finally, the "Classname" component is the actual item to be assigned. Classnames aren't as simple as just typing the name of the item, but a way to find them easily will be detailed in later post.

Those are the components that make up the command. But what about actual working code? Below is an example of a command that will place the Digital Camo Military Cap onto the soldier named s_marksman:

s_marksman addHeadgear "H_MilCap_dgtl";

Simply write this into the init line of any character and it will place it on the s_marksman soldier. If you want to place the Cap onto the current unit without a name or just for ease of coding, the unit component can be replaced with this.

this addHeadgear "H_MilCap_dgtl";

This command will assign the Digital Military Cap to whatever unit the line is placed in. It can be used in as many units as you like and will not conflict.

With these commands you can create a quick, customised character to suit your liking or environment. Here is an example to create a Recon Marksman styled soldier:

this addheadgear "H_Watchcap_camo";
this addUniform "U_I_CombatUniform";
this addVest "V_PlateCarrierIA1_dgtl";
this addBackpack "B_AssaultPack_ocamo";
this addGoggles "G_Shades_Black";


Here is what the soldier will look like after the code is placed:
The soldier is now fit for operations and also does a great job at looking awesome too. Below is a summary of all the code and components:
_________________________________________________________________________________
The basic outline of the command:
unit command "Classname"; 
A simple command to assign the item to the current soldier
this addHeadgear "H_MilCap_dgtl";
Completely re-dress the soldier:
this addheadgear "H_Watchcap_camo";
this addUniform "U_I_CombatUniform";
this addVest "V_PlateCarrierIA1_dgtl";
this addBackpack "B_AssaultPack_ocamo";
this addGoggles "G_Shades_Black";
The next post will be looking at how to remove items, weapons and gear from soldiers to allow for easier customising and replacing.